Collaboration
Voting management
ProjeQtOr gives users the possibility to vote on tickets, activities, change requests or requirements.
The voting functionality is a module and will need to be enabled through module management in order to be used.
To make an item votable you must create some use rules.
The principle is to assign points to users so that they can vote on a particular item.
See also
Voting attribution rule
Points are assigned to a client and his contacts or to a user.
It is possible to assign fixed points or to assign points at a given frequency.
The user can use his own points or the points of the customer he belongs to as a contact.
The allocation is recalculated when the user logs in, for himself and for the client to which he belongs.
The calculation is based on the last date of assignment of voting points.
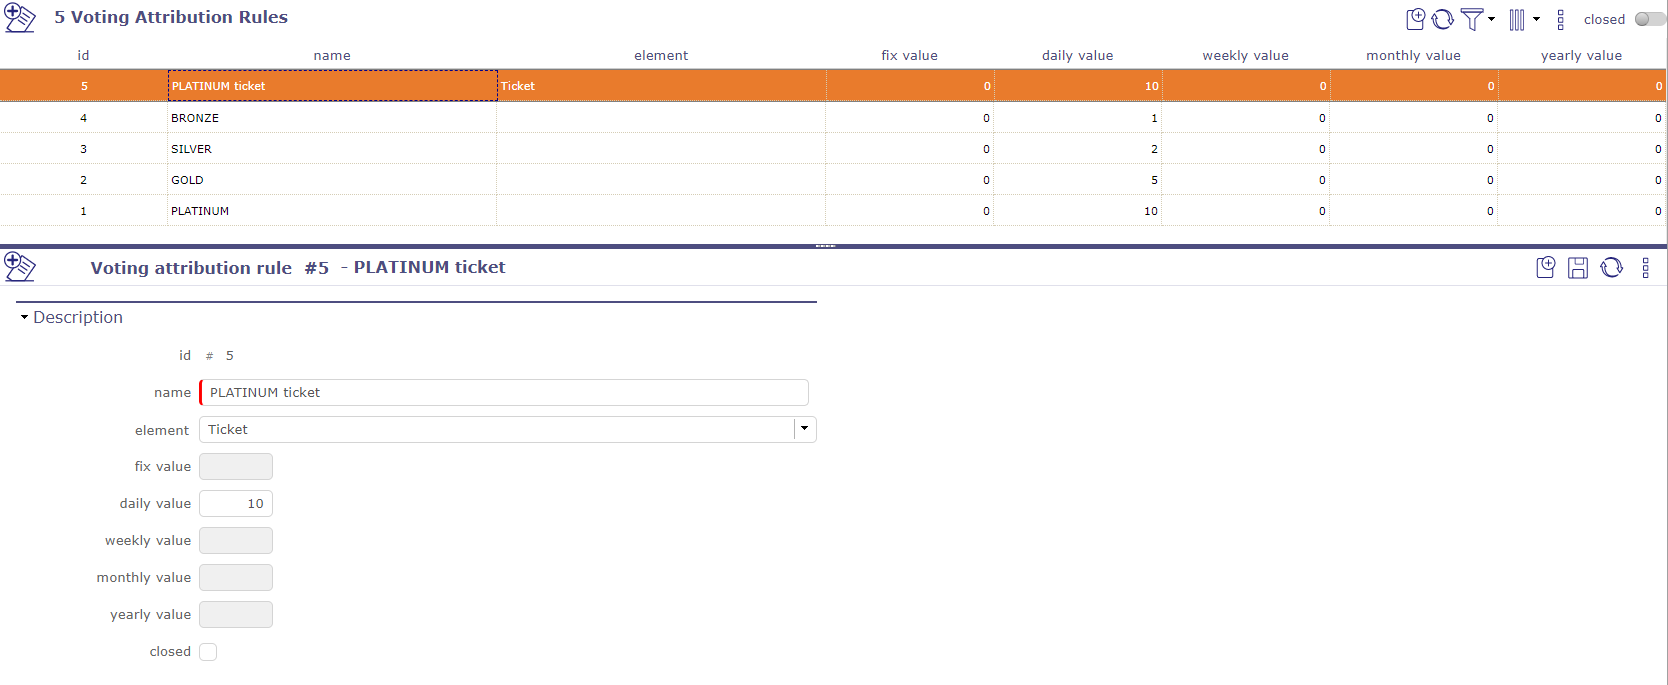
Voting attribution rules screen
On the voting rules screen click on  to create a new rule.
Fill in one of the voting elements. If the field is left empty, then the attribution will concern all the voting elements at the same time.
Fill in a value (number of points) to give to the user.
Fix value
You give a well-defined number of points that will not change.
To reassign points, you must recreate a new attribution rule.
Periodicity of values
You give a number of points which will increment at regular intervals.
Every day, every week, every month or every year, the user will receive the number of points entered.
Attribution
On the client or user screen, in the Voting attribution section you add the rules created beforehand.
Click  to add a rule.
The pop-up opens and you can choose the rule(s) that suits your needs.
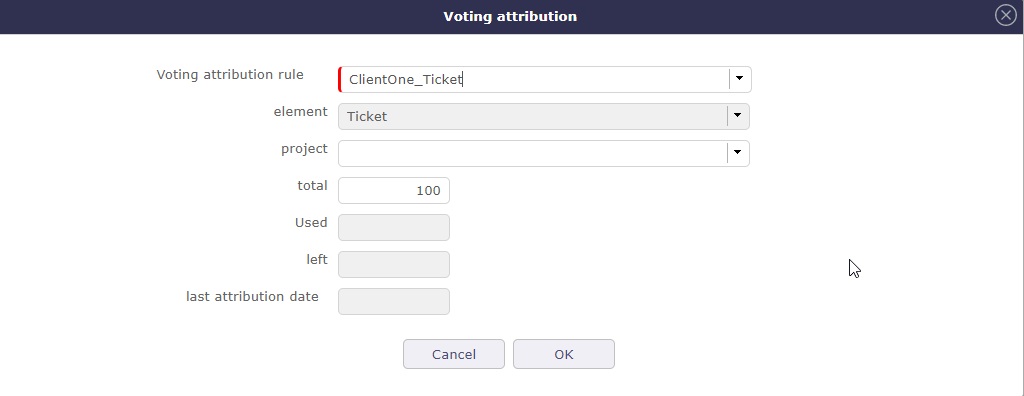
Voting attribution pop-up
The information is retrieved automatically from the allocation rule and the history of points spent.
You will be able to follow the evolution of your points directly on the customer or user screen.
Voting use rule
To be able to vote, it is necessary to create rules for the use of votes.
How the user will and can use their points, on what element and how to convert and equate points to workload days.
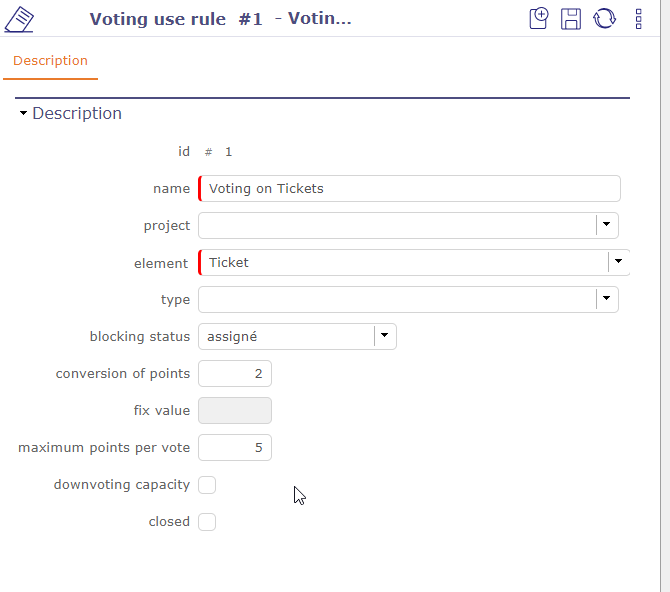
Click on to create a new rule
The project is not mandatory. If it is filled in then the points will only be usable on the elements of this project.
The voter can vote without having the rights to update the item, just with “read” rights on the element and a certain number of points.
The voter can withdraw his points from one element to put them on another.
Blocking status
At a stage (status to be defined), the element can be blocked: the points can no longer be edited or deleted.
conversion of points
Conversion ratio of estimated work into number of points.
For example with a ratio of 2, a ticket with 1.5 estimated work will have target points of 3.0
Fix value
The fixed value is only filled in if the assignment rule linked to the usage rule is filled in as a fixed value.
Maximum points per vote.
Vous pouvez fixer un maximum de point à utiliser sur un élément votable.
Si vous fixer cette valeur, vous ne pourrez jamais dépenser plus que cette valeur sur l’élément.
Downvoting capacity
The voter can vote negative. This is a good way to show your disinterest or a way of mentioning that you don’t like the general idea of the element.
Vote
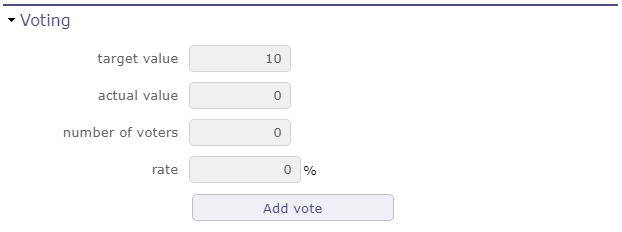
When a voteable item is defined, the voting attribution table is available on the respective screens of the items.
Voting section
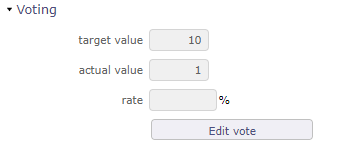
The target value is populated only if you have estimated work on the item.
Estimated work on tickets and requirements and validated workload on activities.
See: Dates and duration
Tip
Convertion
TargetValue = ceil (plannedWork * workPointConvertionRate)
If work = 0,5j | rate = 3 –> points = 2
There is no decimal value. Round up to the next whole.
If work = 5j | rate = 2 –> points = 10
Click on the vote button to access the voting pop-up.
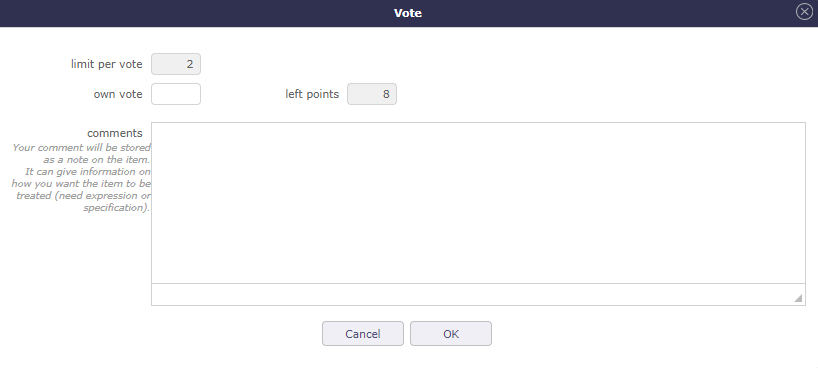
Voting pop-up
Fill in the number of points you want to use for this vote.
Limit per vote
indicates the maximum number of points you can use for voting this item.
Own vote
The user uses his points in his own name.
Client vote
The user uses the points attached to the customer as a contact.
Left points
Indicates your remaining number of points for the user and for the customer.
Comment
The comments are added as note on the item page.
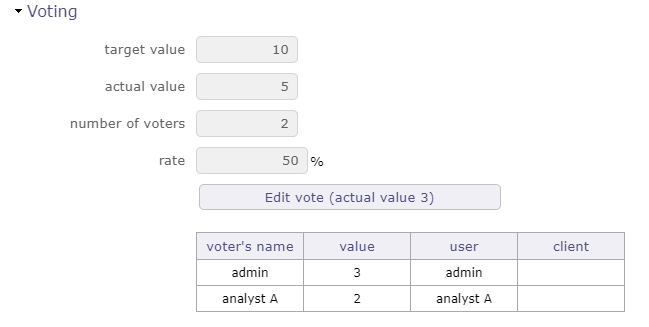
When a user/customer has voted, a tracking table allows you to see who has voted and how many points have been scored.
The rate indicates the percentage of progress for the vote of the element according to the target value and the number of votes.
On the Kanban this percentage is reflected by the color filling of the vote icon.
To modify or delete your vote, click on the edit vote button. Leave the field empty or fill in 0 to cancel your vote.
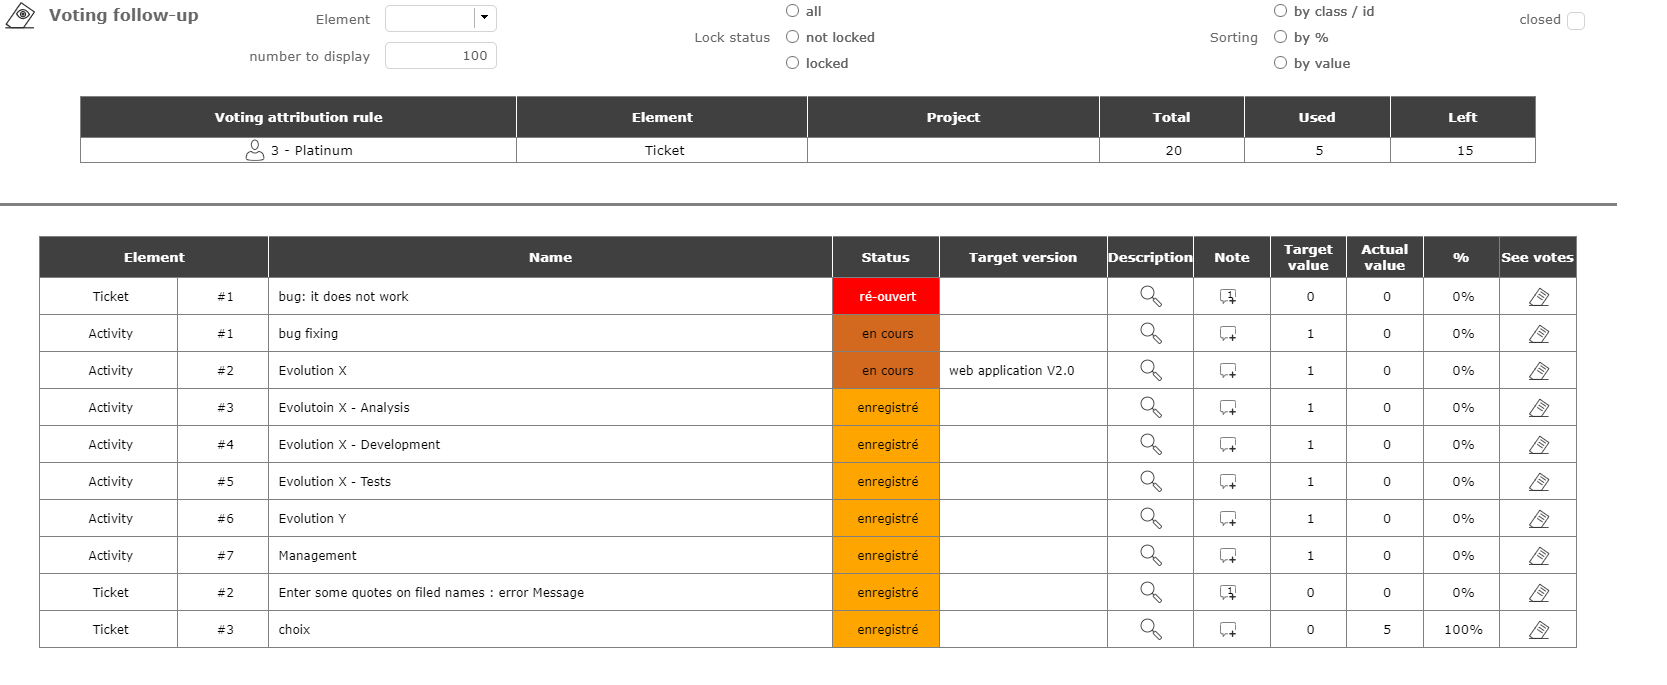
Voting follow-up
The area at the top of the screen allows you to view the allocation rules that are linked to you.
The area at the bottom of the screen allows you to see the voted items, sorted by descending % of votes.
Voting follow up screen
Filters make it possible to restrict the view of the elements and to sort them.
Click  to display the item detail in a pop-up.
Click  to view or add a note.
Click  to display the voting table.
Click on the voteable item’s ID to go to the item’s screen.
On this screen, a project manager (rights to be defined) can modify the target version and the status of one or more elements.
Voting Attribution follow-up
The vote attribution follow-up screen allows you to view the elements voted by a user.
Username
Name of the client if he is the latter’s contact.
The attribution rule linked to it.
The element affected by the assignment rule.
The status
The target version
The project if it has been informed about the rule of use linked to the element.
The points acquired, spent and remaining

Voting attribution fllow-up screen
Several filters allow you to restrict the display by user, client and/or element.
Vote on element
It is possible to vote on tickets, change request anbd requirements.
In the detail tab of each element, find the voting section. The target value, current value, number of votes and fill rate are displayed.
Click on the vote button to assign a vote on the selected item.
Voting Section
In the voting window, several pieces of information such as the maximum point limit of the vote that you can use on the vote of the item in question.
Your personal vote which is not necessarily identical to the maximum points that you can award.
And finally the number of points that you have left to spend in the period of use set upstream in the rules for awarding and using votes.

Voting pop-up
Once you have validated your vote, if the specific access dedicated to voting have been activated, a table appears to display the names of the voters and the points that each of them has assigned to the element.
If several people have voted, the cumulative number of their points is displayed in the current value.
You continue to see the number of your points already assigned, directly in the vote button or in the table if you have the right to see it.
In the specific access, if the display of the table is deactivated, you can display at least the names of the voters.
In any case, the names of the voters and the points they have assigned are necessarily displayed in the table.
Voting table